A greenhouse is a fantastic addition to any garden, extending your growing season and providing a controlled environment for plants. Building your DIY greenhouse can be a rewarding project, allowing you to customize it to fit your needs and budget. Whether you’re looking to grow vegetables year-round, start seedlings, or enjoy a variety of plants, a greenhouse can enhance your gardening experience. Here’s a comprehensive guide on how to build a DIY greenhouse from start to finish.
1. Planning and Design
Before you start building, it’s crucial to plan and design your greenhouse. Consider the following factors:
Purpose:
- Growing Season Extension: If you want to extend your growing season, consider a larger greenhouse with heating options.
- Seed Starting: For seed starting, a smaller, simpler greenhouse will suffice.
- Tropical Plants: If you’re growing tropical plants, you’ll need a greenhouse with good ventilation and possibly heating.
Location:
- Sunlight: Choose a location with ample sunlight, ideally with south-facing exposure to maximize solar gain.
- Accessibility: Ensure the location is easily accessible for maintenance and watering.
- Drainage: Avoid areas prone to waterlogging. Good drainage is essential to prevent excess moisture around your greenhouse.
Size:
- Space: Determine how much space you need based on the number of plants and the type of greenhouse you want. Common sizes range from small hobby greenhouses to larger structures for serious gardeners.
Materials:
- Frame: Common materials include wood, metal, or PVC. Each has its pros and cons regarding durability, cost, and ease of construction.
- Covering: Options include glass, polycarbonate panels, or plastic sheeting. Each material affects insulation, light transmission, and durability.
2. Gather Materials and Tools
Based on your design, you’ll need specific materials and tools:
Materials:
- Frame: Pressure-treated lumber, metal tubing, or PVC pipes
- Covering: Polycarbonate panels, greenhouse film, or glass
- Foundation: Concrete blocks, gravel, or a wooden base
- Doors and Ventilation: Pre-made doors, vents, or DIY options
- Other: Screws, nails, brackets, hinges, and weatherproofing materials
Tools:
- Hand Tools: Hammer, saw, screwdrivers, and measuring tape
- Power Tools: Drill, circular saw, and possibly a miter saw
- Safety Gear: Gloves, safety glasses, and a dust mask
3. Building the Foundation
The foundation provides stability and ensures that your greenhouse is level and secure.
Steps:
- Clear the Site: Remove any grass, weeds, or debris from the chosen location.
- Level the Ground: Use a level and shovel to make the ground as even as possible.
- Lay the Foundation:
- For a wooden base, lay pressure-treated lumber in a rectangular frame, anchoring it with stakes or concrete.
- For a concrete block foundation, place blocks in a rectangular shape, ensuring they are level.
- Gravel can also be used to create a base that provides good drainage.
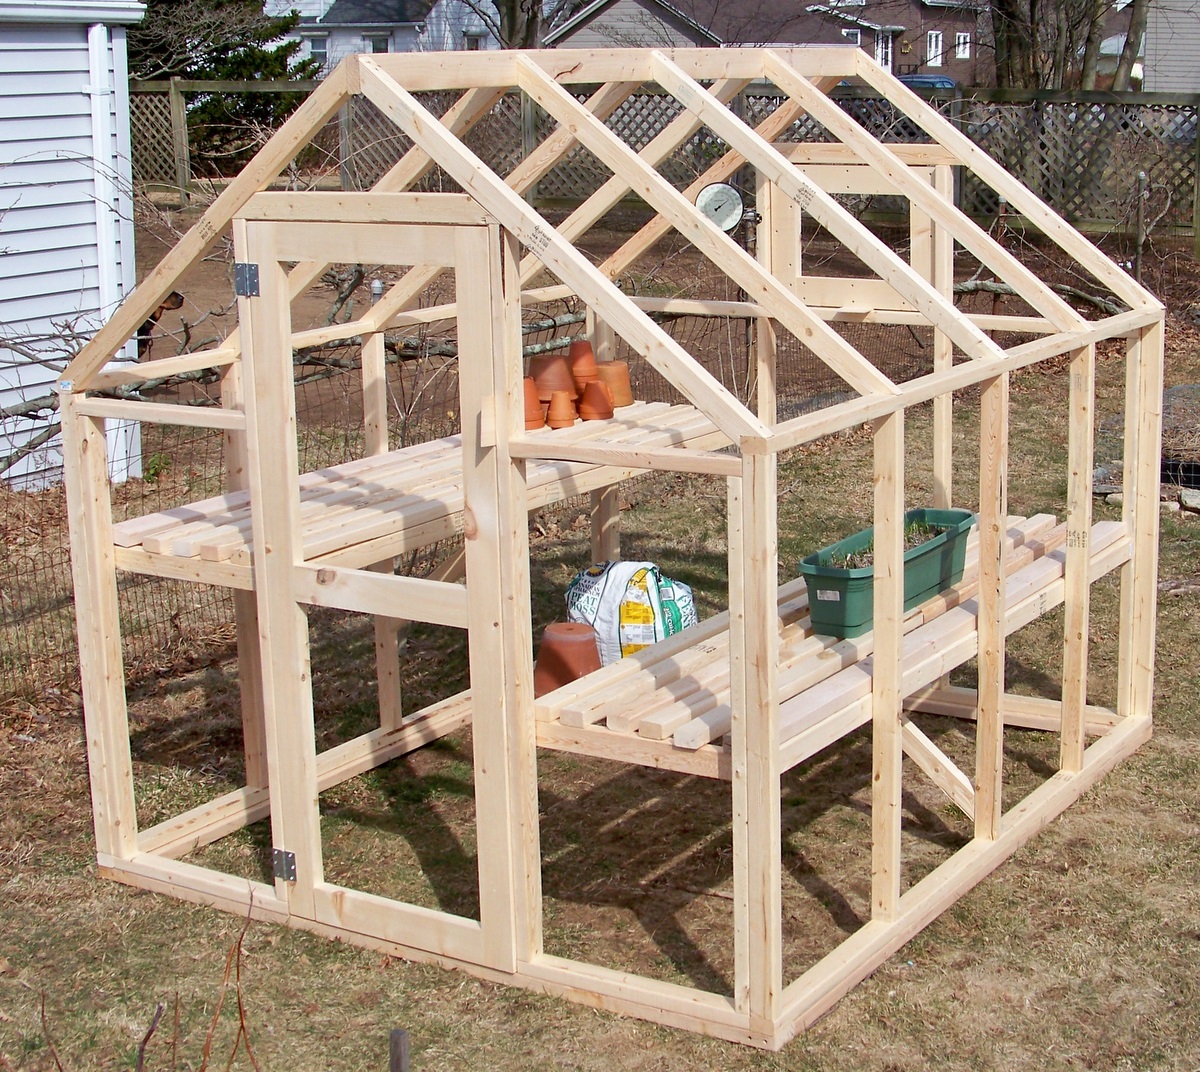
4. Constructing the Frame
The frame supports the covering and determines the structure of your greenhouse.
Steps:
- Build the Base Frame:
- Assemble the base frame according to your design using lumber, metal, or PVC.
- Ensure all joints are secure and level.
- Erect the Vertical Supports:
- Attach vertical supports to the base frame at regular intervals. If using wood, ensure they are properly anchored. For metal or PVC, use brackets and connectors.
- Add Roof Supports:
- Install horizontal supports across the top of the vertical supports to create the roof framework. This step may involve cutting and attaching crossbeams or rafters.
5. Adding the Covering
The covering protects plants and provides a controlled environment.
Steps:
- Attach the Covering:
- For polycarbonate panels, cut panels to size and attach them to the frame using screws or brackets. Overlap edges to prevent leaks.
- For greenhouse film, stretch the film over the frame and secure it with clips or staples. Ensure it’s taut and free of wrinkles.
- Glass requires careful handling and precise fitting. Install glass panels using clips or seals to secure them in place.
- Install Doors and Vents:
- Fit pre-made doors or build custom ones using wood or metal. Ensure they open and close easily.
- Install vents to ensure proper airflow. You can use adjustable vents or create DIY versions using plastic or mesh.
6. Setting Up Interior Components
Once the frame and covering are in place, set up the interior to support plant growth.
Steps:
- Install Shelving and Benches:
- Use sturdy materials to build shelving or benches for plant trays and pots. Ensure they are stable and positioned to maximize space.
- Add Irrigation:
- Install a drip irrigation system or water hoses to provide consistent moisture. Consider adding a rainwater collection system for sustainability.
- Provide Heating (if needed):
- For cold climates, install a heater or use passive solar techniques to maintain temperature. Options include electric heaters, propane heaters, or even thermal mass materials like water barrels.
- Lighting:
- Ensure adequate lighting, especially in winter. Supplemental grow lights can be added if natural light is insufficient.
7. Maintaining Your Greenhouse
Proper maintenance ensures that your greenhouse remains effective and lasts for years.
Maintenance Tips:
- Regular Cleaning: Clean the covering and interior to remove dirt, algae, and pests.
- Check for Damage: Inspect the structure for any signs of damage or wear. Repair any issues promptly to prevent further damage.
- Monitor Temperature and Humidity: Use thermometers and hygrometers to keep track of conditions inside the greenhouse and make adjustments as needed.